Sunday, September 23, 2012

Mexican Cooking Challenge Part 2

I was serious when I said I was going to cook every recipe in the Saveur Mexican Issue.  (In case you forgot the magazine can be found at www.saveur.com) There are well over 30 recipes in this magazine which includes everything from salsas to stews to churros (that's going to be a fun one to make).  Well, I have now made 2 of the recipes.

Friday night I decided to make the Enchiladas de Chile Ajo (Oaxacan Red Chile Enchiladas).  I must give warning ahead of time that this is a spicy recipe, so you Minnesotans who are reading this blog, you might want to "have some beer or a pop next to you" when you eat it.  (That is what the cheese/general store owner told TS and I when we were buying spicy cheese curds last weekend when we brought my parents to see the twine ball.  The cheese curds aren't that spicy).

The recipe may seem intense, and I'm not going to lie, it did require me to perform multiple tasks at one time.  I recommend reading the whole recipe through so you know what has to be done at each step.  It is not like I don't read every recipe all the way through multiple times before I start, but with this one I was especially glad I did.  If you do read the recipe all the way through, it is not much to tackle.  Just make sure you are using the time stuff is resting or cooking to do something else.

All that being said, this recipe was well worth the effort.  All the time and effort was put into making the enchilada sauce.  This recipe made A LOT of enchilada sauce.


This is the leftovers! Let's just say TS and I will eat a few more meals using the enchilada sauce.  To me, making a recipe that provides leftovers is the next best thing to going out.

And the final product looked like this:
 

The recipe from Saveur for Enchiladas de Chile Ajo can be found here.  My adaption (which isn't much of an adaption) is below.

INGREDIENTS 
3 oz. dried guajillo chiles (can be found at your local Mexican market)
8 cloves garlic, peeled
6 plum tomatoes, cored
2 serrano chiles, stemmed (also can be found at your local Mexican market)
½ large white onion, cut into ½" slices, plus 1 medium white onion, minced
1 tbsp. canola oil
2 cups chicken stock
1 tsp. dried oregano
1 tsp. dried thyme
¼ tsp. freshly ground black pepper
1 slice white sandwich bread, toasted and crumbled (I actually used some left over challah that my mom made for me last week)
¼ cup packed light brown sugar
2 tbsp. fresh lime juice
Kosher salt, to taste
18 6" corn tortillas (for 2 of us I only made 7 tortillas, but as you saw there was plenty of sauce)
1 ½ cups shredded cooked chicken  (I used left over chicken breasts and shredded the meat, but if you do not have left over chicken you can buy a roasted chicken from your grocery store and shred the meat)
¾ cup crumbled Cotija cheese, plus more to garnish (you can find this at your local Mexican market)

INSTRUCTIONS
1. Heat a 12" skillet over high heat, and add guajillo chiles.
    1a. Cook, turning once, until lightly toasted, about 2 minutes.
    1b. Transfer to a bowl and cover with 3 cups boiling water; let sit until soft, about 20 minutes.
    1c. Drain chiles, reserving soaking liquid, and remove stems and seeds.
    1d. Transfer chiles to a blender along with 1 ½ cups soaking liquid; purée until smooth, and set chile purée aside.

2. While guajillo chiles are steaming, return skillet to high heat, and add garlic, tomatoes, chiles, and large onion slices.
    2a. Cook, turning as needed, until vegetables are lightly charred all over, about 8 minutes for the garlic, 14 minutes for the tomatoes, chiles, and onion slices.
    2b. Transfer vegetables to a bowl, and let cool.

3.  Once vegetables are done cooking and set to cool and you have followed all of step 1, return skillet to high heat, and add 1 tbsp. oil; add chile purée, and fry, stirring constantly, until thickened to a paste, about 12 minutes.

4. After making the paste, pour it into a blender adding charred vegetables, chicken stock, oregano, thyme, pepper, and bread; purée until smooth, at least 2 minutes.

5. Pour through a fine strainer into skillet, and return skillet to medium-high heat; bring to a boil.
    5a. Once sauce has begun to boil, reduce heat to medium-low, and cook until slightly reduced, about 6 minutes.
    5b. Stir in brown sugar and lime juice, and season with salt.
    5c.  Keep enchilada sauce warm in skillet.

6. Spray a skillet with cooking spray and heat over medium-high heat.
    6a. Heat 1 tortilla at a time, about 30 seconds on each side.
    6b. Grasp tortilla with tongs and transfer tortillas to skillet with enchilada sauce, flip the tortilla so each side is coated.
    6c. Place coated tortilla on a place and add some cheese, diced onion and chicken in the center of the tortilla and roll tortilla to form tight roll.
    6d.  Transfer rolled tortilla to a baking pan (I used my Pyrex baking pan) and repeat steps 6a-6c until complete.

7.  Sprinkle cheese on top of enchiladas and serve.

TS said that this recipe was one I could make anytime I wanted to!  Seeing how much sauce I have left over, we will be eating this again really soon.

Saturday, September 22, 2012

Something Sweet for the New Year

Note: This was to be posted on Wednesday, but life kind of got in the way and I am just completing this now on Saturday.  

 My parents were in town to celebrate Rosh Hashana with TS and me.  I love it when my parents come up because we eat well, and in my book, eating well is the best thing ever.  I think my parents enjoyed seeing the largest ball of twine made by a single man more than the restaurants.  But, then again, who wouldn't love seeing the ball of twine in Darwin, MN?

Before I get sidetracked on the ball of twine, I must provide you with a recipe.  My friend Sascha and I decided to make Erev Rosh Hashana dinner for our parents (and it turns out Marisa came too!).  Since it is Rosh Hashana we had to have apple something.  Well, we doubled up on the apples for dessert.  Sascha made a French Apple Torte that was delicious with my Apple Cider Cinnamon ice cream.

Now, I take no credit for this recipe coming out of my creation.  I just followed a recipe from Saveur.  Remember?  That is the magazine from the last post.  Now you can see why I love my father so much for giving me a subscription to this magazine.  The ice cream was perfect!  Smooth, creamy, apple-y, cinnamon-y and the perfect complement to Sascha's torte.

If you are going to make this recipe, you do need an ice cream maker.  When TS and I were registering for gifts some of the "fun" kitchen items for which we registered were an ice cream maker and a malt/shake maker.  Highly recommended for your kitchen on our opinion.  If you are going to get an ice cream maker I recommend the Cuisinart 2 Quart Ice Cream maker.  I have yet to have any complaints with it.

Now you are probably anxious for the recipe.  The official recipe is here, but mine adaption is below:

INGREDIENTS
2 cups apple cider
¾ cup sugar
1 stick cinnamon
2 cups 2% milk
2 cups heavy cream
¼ tsp. ground vietnamese cinnamon (you can use regular cinnamon, but I have learned that Vietnamese cinnamon is stronger and more intense)
6 egg yolks

INSTRUCTIONS

1.  In a 4 quart saucepan add apple cider, sugar and cinnamon stick and whisk together.
2.  Stirring occasionally, bring mixture to boil over medium-high heat.
3.  Once mixture has boiled, reduce heat slightly and continue to boil and stir until reduced by at least half (boil for about 25-30 minutes)
4.  When reduced, remove pot from heat and take out cinnamon stick.
5.  Stir milk and cream into apple cider mixture until smooth.
6.  Add ground cinnamon and egg yolks to milk/cider mixture and whisk together until smooth.
7.  Put pot back on stove and stirring often, cook mixture until the mixture thickens and will coat the back of a wooden spoon. (about 20-25 minutes).
8.  Pour thickened mixture through a strainer and into a medium sized bowl.
9.  Refrigerate mixture about 2-3 hours until chilled.
10.  Once chilled, pour mixture into your ice cream maker and follow ice cream maker's instructions for making ice cream.  (mine I had to pour the mixture into the ice cream maker and turn it on for 20-25 minutes, until the mixture was thick, and slowly moving over the blade, but not so slow that it looked hard.  Almost the consistency of partially melted frozen yogurt)
11. Pour mixture from ice cream maker into a bowl and freeze for at least 4 hours. 

This ice cream was a hit at Rosh Hashana dinner.  However, it would be a great addition to any meal during the year. 

L'shana Tova! 

Thursday, September 13, 2012

Mexican Cooking Challenge

This blog seems to be an every-now-and-then-when-I-have-time-and-when-I-make-something-good type of blog.  So, after a 2 month hiatus, I have another post.

I subscribe (thanks to my loving dad) to Saveur magazine (www.saveur.com).  This is a fantastic cooking magazine that provides me with recipes from around the world.  What I love about Saveur is that there are not only recipes, but articles describing the region of the world from which the dish came.  The most recent issue is all about Mexican cuisine.  Now, if you know TS and me, you know that after seafood, we love Mexican, Central American and South American food.  It is almost our go-to comfort food.  So, this issue of Savuer really piqued our interest.  The cover was even so appealing that TS opened it up and started reading it.

After making one dish from this issue last night, I have now decided it is my goal for the winter to not only perfect my pie crust (another story for another time) but to also make each recipe in this magazine.  The dish last night was carne asada (steak tacos). 

Carne asada was actually a really easy and quick dish to prepare.  What I love about making steak like this is the fact that it has to marinate.  Marinating means you can do other stuff while your meat gets all yummified.  This marinade also allowed me to pull out my blender, which I love but rarely use.  I didn't let the steak marinate a long as the recipe called for because it was late when I started and I was hungry.  Instead of letting it marinate for an hour, I only let it marinate for 40  mins. It still turned out well. 

This meal, after the marinade was made (which only took me about 15 mins to make), only took about 30 mins to cook and put on the table.

Here is the recipe for Carne Asada from Saveur Magazine - somewhat altered by me.

INGREDIENTS
4 cloves garlic, peeled (keep whole)
3 tbsp. canola or vegetable oil
6 canned chipotles in adobo, roughly chopped
1 large white onion, sliced crosswise into ¾"-thick rings
1 small white onion, roughly chopped
2 limes
1 ½ lb. trimmed skirt steak, cut into 4 steaks
Kosher salt and freshly ground black pepper, to taste
1 jalapeño, halved and stemmed
Warm tortillas, for serving

INSTRUCTIONS
1. Heat an 8" skillet over high heat; add garlic, and cook, turning as needed, until charred all over, about 12 minutes.

2. In a blender puree charred garlic, chipotles, small chopped onion, and juice from 2 limes.

3. In a 9" x 13" baking dish add steaks. Pour puree over and toss steaks in marinade to coat; season generously with salt and pepper. Cover with plastic wrap and let marinate at room temperature for 1 hour or in the refrigerator for up to 4 hours.

4. Build a medium-hot fire in a charcoal grill or heat a gas grill to medium hot. (Alternatively, heat a grill pan over medium-high heat -- THIS IS WHAT I DID BECAUSE IT WAS RAINING OUTSIDE) Brush marinade from steaks and transfer to the grill; cook, flipping once, until charred and cooked to desired doneness, about 8 minutes for medium. Transfer steaks to a cutting board, and let rest for 5 minutes.  NOTE: I cooked mine on medium-high heat in a grill pan for 6 minutes on each side and it came out medium rare. 

5.While steak is resting, place remaining onion and jalapeño on grill (or in grill pan), and cook, turning as needed, until charred and softened, about 10 minutes.

6. Finely chop steaks after resting for 5 mins, and place in medium sized mixing bowl.

7. Finely chop browned/charred onions & jalapeno and add to chopped steak.

8. Toss grilled vegetables and steak in bowl.

9. Serve with tortillas, lime wedges and salsa verde on the side. I did not have time or the ingredients to make salsa verde, but I did have regular red salsa so I served the steak with that.

I ended up serving this meal with black beans and a salad.  It was a great meal and I am looking forward to making the next dish from Saveur.


Thursday, July 19, 2012

A Special Gift from My Parents

One thing we do not get in the land of the cold is fresh Gulf of Mexico shrimp.  My parents, who live in the land of seafood, decided to be super nice and send TS and me 5 pounds of shrimp.  Now one thing for you to understand is TS and I eat shrimp ALL the time.  But there is nothing like shrimp from the Gulf of Mexico, so of course we got excited about this delivery. When I heard I was getting shrimp I immediately thought of everything I would do with them.  I turned to a Chipotle Grilled Shrimp recipe.  I based the recipe off of one I found on www.closetcooking.com


Chipotle Grilled Shrimp
(for 2 people)

1 lb Jumbo Shrimp
2 chipotle peppers in adobo sauce, finely chopped
2 cloves garlic, minced
1/4 c. finely chopped onion
1 tsp honey
1 tsp adobo sauce (from chipotle in adobo sauce can)
2 Tbsp chopped cilantro

1. Peel the shrimp
 (yes, this is how big the shrimp were that my parents sent me!  - YUM!  Thank you parents!)
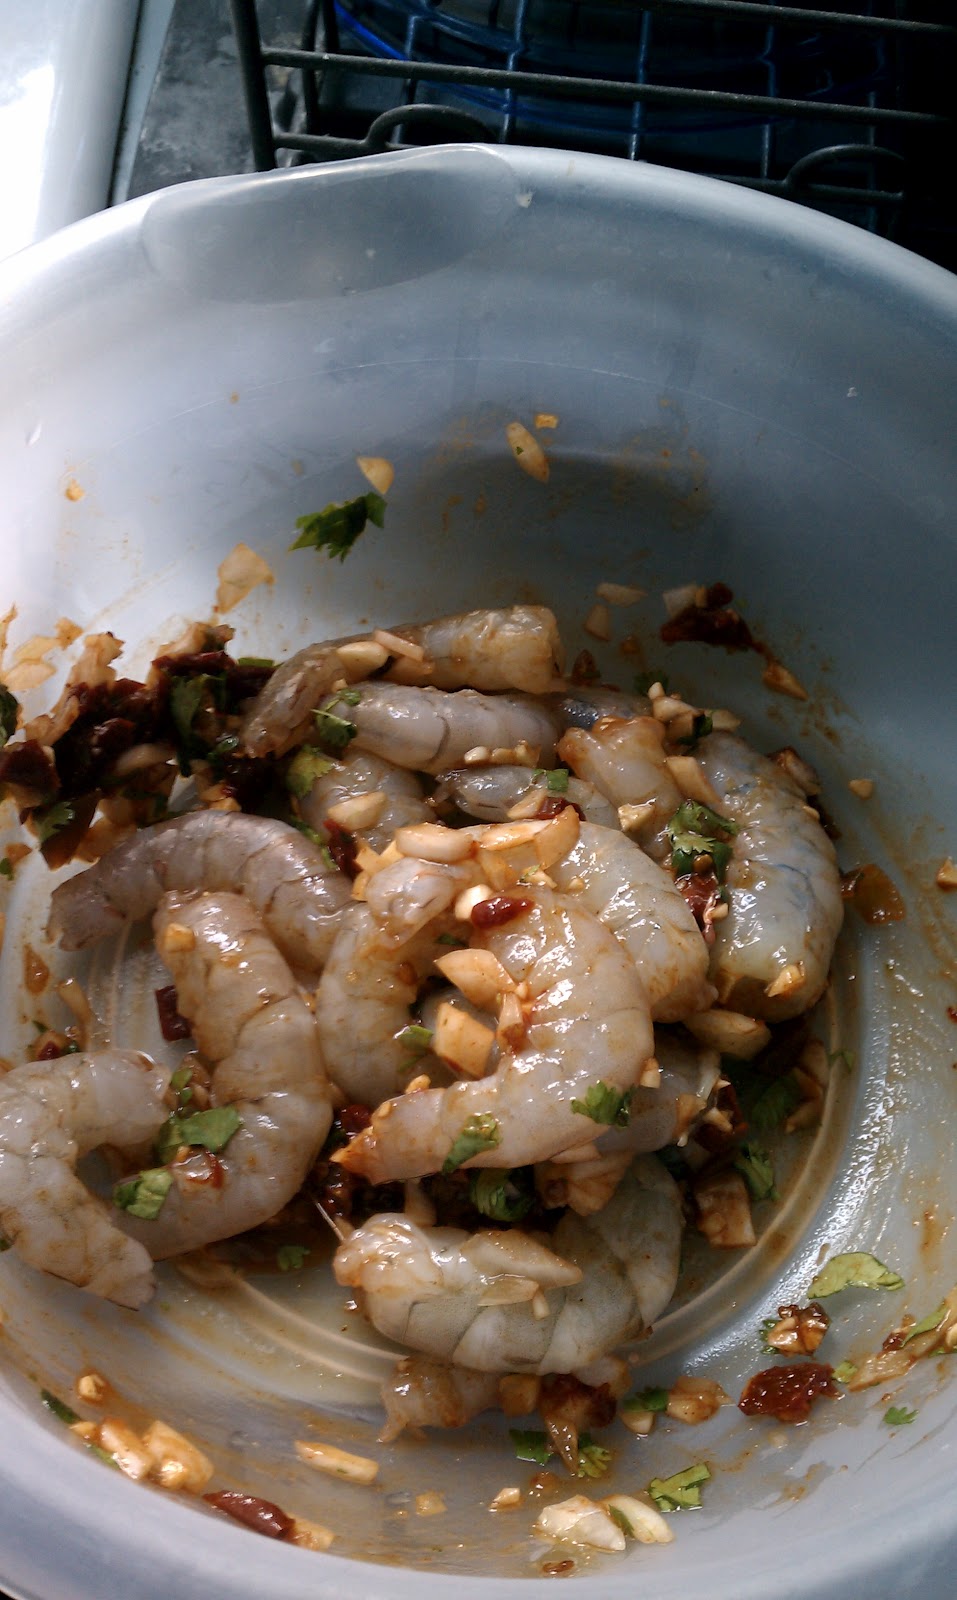
2. In a bowl mix the chopped chipotle peppers, garlic, onion, honey, adobo sauce and cilantro.
3. Add the shrimp and toss.
(YUM! and YUM!  Even TS said the kitchen smelled good after this)
4. Cover the bowl and let marinate for 20 mins.
5. Spray a grill pan and add shrimp and marinade in one layer on the grill pan.
6.  Cook the shrimp for 3 mins on one side and then flip and cook for 2 mins then turn off the heat and let sit in the pan for 2 more mins.
VOILA!  You have Chipotle Shrimp!

I served the shrimp over rice with a side of farmers' market steamed broccoli.  MMM.

Thank you parents for the shrimp.  It was amazing.


Wednesday, April 4, 2012

A Birthday Dinner

Last night was my father-in-law's birthday. Since my mother-in-law was out of town his 3 boys stepped up and invited him to meals. The youngest son bought him lunch, the middle son provided him with dinner #1 and the oldest son provided him with dinner #2. Actually I'm positive that the oldest son did nothing but eat dinner #2 and the wife (aka me) made the dinner. Since I didn't know what time I would be home I turned to an easy dinner that I had been thinking about making for a long time. My take on Shrimp Diablo.

Shrimp Diablo (Laurie's Version) - serves 3

24 shrimp, peeled (I generally make 8-10 shrimp/person for my pasta dishes)
1 tbsp olive oil
1/2 tsp crushed red pepper flakes
1 can tomato paste
1 can diced tomatoes
1 tsp dried basil
1 tsp salt
5 cloves garlic, finely chopped
160g linguini (yes I weigh my pasta in grams)

1. mix together shrimp, 1 tbsp olive oil and 1/2 tsp crushed red pepper flakes in a bowl. Cover and refrigerate for at least 1 hour.
2. Combine, tomato paste, diced tomatoes (including liquid), basil, salt, garlic in a bowl and set aside. (If you want to add some heat to your sauce, add 1/4 tsp crushed red pepper flakes)
3. When you are ready to make dinner, heat the pasta sauce in a pan over low heat for 10 mins and start your pasta going.
4. When water for your pasta is boiling, add the shrimp to the sauce and turn the heat to medium high and cook shrimp until pink and "c" shaped.
5. Cook your pasta
6. Serve shrimp on top of your pasta. ENJOY!

Along with my version of shrimp diablo, we had steamed asparagus and plum cobbler for dessert. MMM. I sure hoped my father-in-law enjoyed his birthday dinner #2 because I know I sure did.

Wednesday, March 21, 2012

Yes I'm Still Here

I know it has been FOREVER since I last blogged, but I did say when I started that this was a real-life blog and things have just gotten in the way of me updating this. I have still been making dinners at home, but nothing too exciting until last night. Which is why I am back. Last night's dinner was Broccoli & Cauliflower Mac & Cheese and a salad. Too me, this dish would be a perfect way to get kids to eat their veggies. :)

Here is the recipe for Broccoli & Cauliflower Macaroni & Cheese:

11 oz chopped broccoli
11 oz chopped cauliflower
1/4 onion, chopped
5 cloves garlic, chopped
1 box macaroni noodles
1 c. chicken broth
2 c. skim milk
1 3/4 c. shredded cheese (I used a cheddar & colby jack mix)
1/4 c. bread crumbs
1 1/2 tbsp olive oil
2 tbsp flour
1/2 tsp cayenne pepper
1 tsp salt
1 tsp dried oregano
1/8 tsp nutmeg
fresh ground black pepper

Preheat oven to 400 and spray 9x13 pan with cooking spray.

1. In a large stock pot, add olive oil, onion and garlic and cook until onion is soft (about 5 mins)
2. While onion mixture is cooking, heat water in a LARGE pot to boil. When boiling add macaroni, chopped broccoli and chopped cauliflower and cook for 6 mins. Then drain.
3. When onion is soft add cayenne pepper, salt, oregano and nutmeg and whisk together, let cook for 1 min. Whisk in flour. Then add milk and chicken stock and whisk together constantly until a gentle simmer begins. Once it begins simmering, add cheese and whisk together constantly for 1 min.
4. Add macaroni mixture to milk mixture and stir until all coated. Then pour into 9x13 pan. Sprinkle breadcrumbs on top of macaroni mixture and then sprinkle black pepper on top. (I personally have a pepper mill and did a few turns of that over the top).
5. Bake for 25 mins. Then let rest for 5-10 mins before serving.

Monday, December 5, 2011

Winter is Upon Us - And Here are 2 Fish Recipes

As winter has come to Minnesota, there will be more cooking at home. This means, for you my readers, more recipes. Let me start with the Tilapia recipe I made last week.

I love this recipe. It is so easy and quick and healthy. It is my go-to fish recipe whenever I can get fresh tilapia.

Tomato and Onion Tilapia (serves 2)
2 pieces of tilapia
1 tomato, sliced
1/4 onion, sliced
olive oil
salt
pepper

1. coat bottom of a grill pan with 2 tsp olive oil, then line the pan with tomatoes and onions
2. sprinkle a pinch of salt and pepper over the tomatoes and onion
3. place tilapia pieces on top of the tomatoes and onion, cook on medium heat for 4 - 5 mins
4. flip tilapia pieces, bringing some of the tomatoes and onion to the top of the fish. Cook for 4 more mins. If fish is not flaky, flip and cook for 2 mins on each side until fish is flaky and white.

How easy is that?! The fish is good with a side of polenta or potatoes.

Tonight, I made salmon burgers for dinner. I learned how to make these this summer and I keep tweaking the recipe every time. I have yet to make a bad salmon burger. This is a fairly cheap dish to make because canned salmon is just fine. 1 can of salmon is plenty for 2 burgers. Here is the recipe I made tonight:

Salmon Burgers - 12/5/2011 version
1 can salmon
1/2 c. bread crumbs
1/4 c. red onion, finely chopped
1 tsp dried cilantro
1/2 tsp cumin
1 egg
pinch of salt

1. Drain salmon of all liquid and put in small bowl.
2. Add bread crumbs, red onion, cilantro, cumin, egg and salt to salmon and mix together.
3. Form salmon into patties and put in pan coated with cooking spray. Cook for 4 mins on each side.
4. Put salmon on a hamburger bun with some lettuce and tomato and Enjoy!

There you go. 2 easy fish meals. Both meals take less than 15 mins to prepare and cook. I know you guys are always looking for quick easy recipes to make, so there you go. I served the salmon with roasted potatoes and salad.

I know there are people out there who read this blog and are interested in one serving dinners. So, I'll try to make a few dinners this winter that are one serving dinners and post that. If you have any requests for things you want me to make, please feel free to comment as such. I am always willing to figure out a dinner for you.

Here's to good eating!